How I Automated My Blog Posts (Part1/3)
Table of Contents

Hello everyone,
Finally, I have some quiet time to write this post!
Let’s start from the beginning. 😄
I think you’ve got the idea behind all this—it’s all about writing, even if you feel like you have nothing to say.
I won’t hide it: you do need a bit of technical knowledge to make it happen, but it’s still quite simple.
This article is the first in a series of three articles describing how to set up an environment for creating blog posts in an automated way (note that I use this method to publish these articles!!).
By the way! There’s the manual way and the automated one. I’ll let you imagine which one is the best ;)
Before you can use the killer script (which I will provide later), you’ll need to install the necessary tools for it to work properly. That’s why, in this first post, we will go through the installation of Obsidian and Hugo, as well as their synchronization.
And remember, sooner or later you’re going to realize, just as I did, that there’s a difference between knowing the path and walking the path. #matrix #morpheus

Step 1: Setting Up Obsidian for Writing#
Obsidian isn’t just a writing tool—it’s a creative companion that grows with your ideas.
Getting started is simple:
- Visit the Obsidian website and download the application for your operating system.
- Follow the installation prompts to set up the software on your device.
- Once installed, create your first “vault”—a folder where all your notes and files will be stored.
- Create a folder and give it a name (e.g., “Posts”).
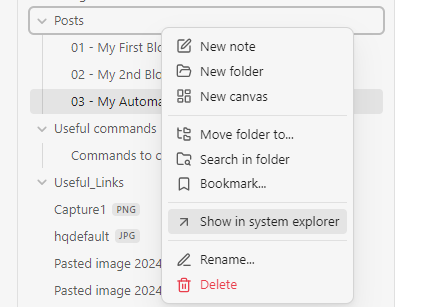
- (optional) Right-click on the folder, select “Show in System Explorer”, and copy the folder’s path to save it for future use.
Step 2: Setting Up Hugo on Windows and Sync It with Obsidian#
Hugo is an excellent tool for static site generation, and when paired with Obsidian, it can streamline your blogging workflow. In this guide, we’ll walk through syncing Obsidian with Hugo, including how to copy posts from Obsidian to Hugo’s content folder and verify them.
1. Prerequisites#
a. Git:#
- Download Git from git-scm.com and install it.
- Verify installation:
git --version
b. Go (Golang):#
- Download Go from golang.org and install it.
- Verify installation:
go version
2. Download and Install Hugo#
- a. Download Hugo Binary:#
-
Go to the Hugo releases page and download the appropriate version for Windows (extended version recommended).

- b. Extract and Add Hugo to PATH:#
- Extract the downloaded
.zipfile to a folder (e.g.,C:\Hugo).- Add the folder to your system’s PATH:
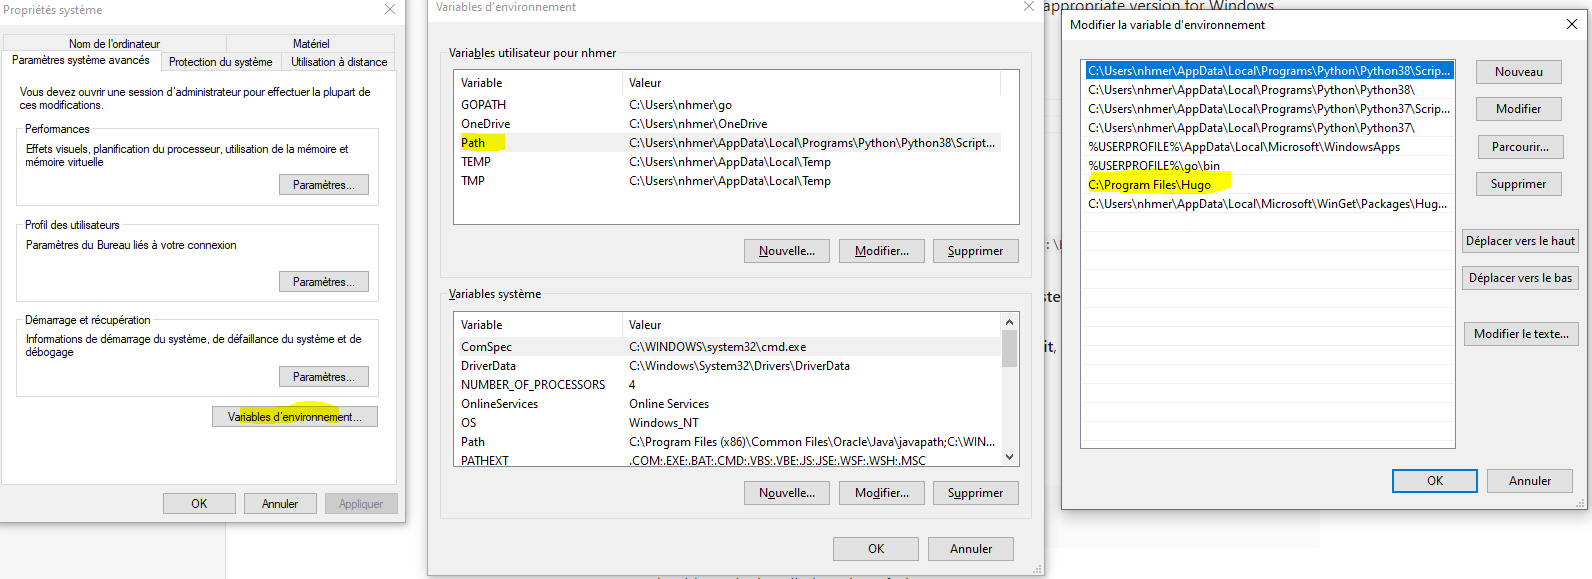
- Open Control Panel > System > Advanced System Settings > Environment Variables.
- Under “System Variables,” select
Path, click Edit, and addC:\Hugo.
- Add the folder to your system’s PATH:

- c. Verify Installation:#
- Open a terminal and run:
hugo version
You should see the installed version of Git, Go & Hugo :

3. Create Your First Hugo Site#
Open a terminal and navigate to the folder where you want your site to reside:
cd C:\MyWebsites
Create a new Hugo site:
hugo new site my-first-site # Initialize a new project
cd my-first-site
Initialize a Git repository (optional but recommended):
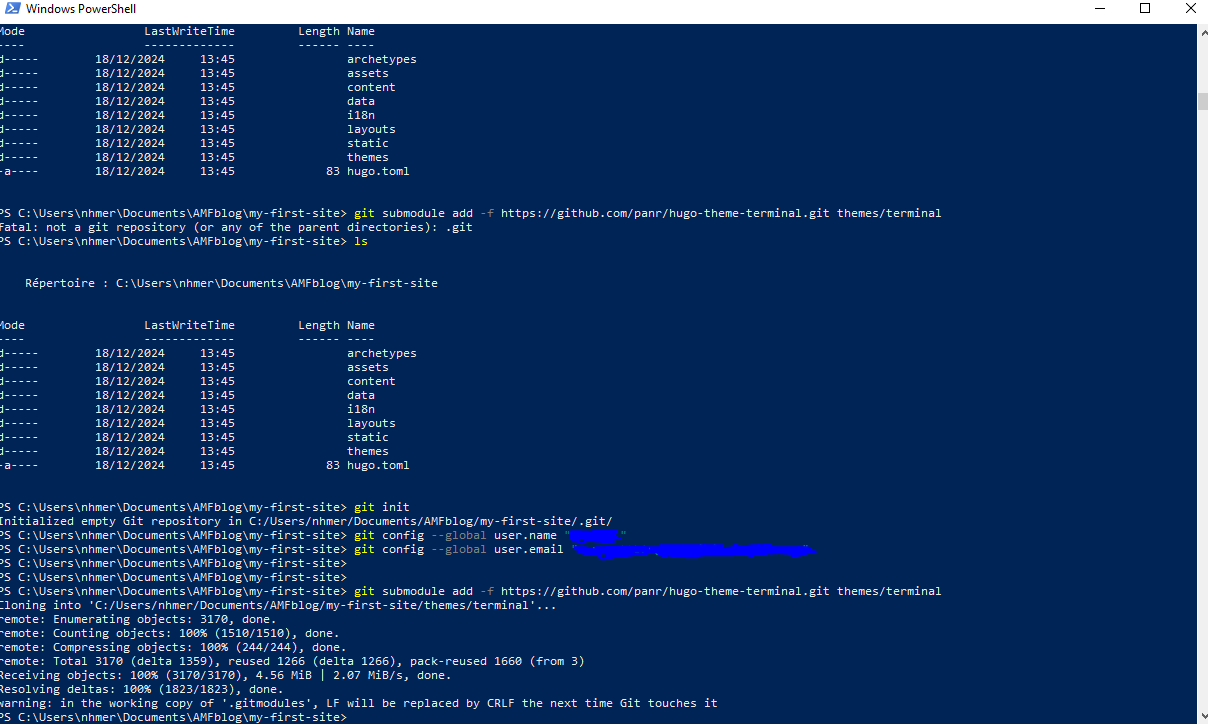
git init # Initialize a local repository
git config --global user.name "Your Name"
git config --global user.email "your.email@example.com"
4. Choose a Theme#
Browse Hugo themes at themes.gohugo.io Add a theme via Git:

git submodule add https://github.com/<theme-repo>.git themes/<theme-name>
 echo 'theme = "<theme-name>"' >> hugo.toml
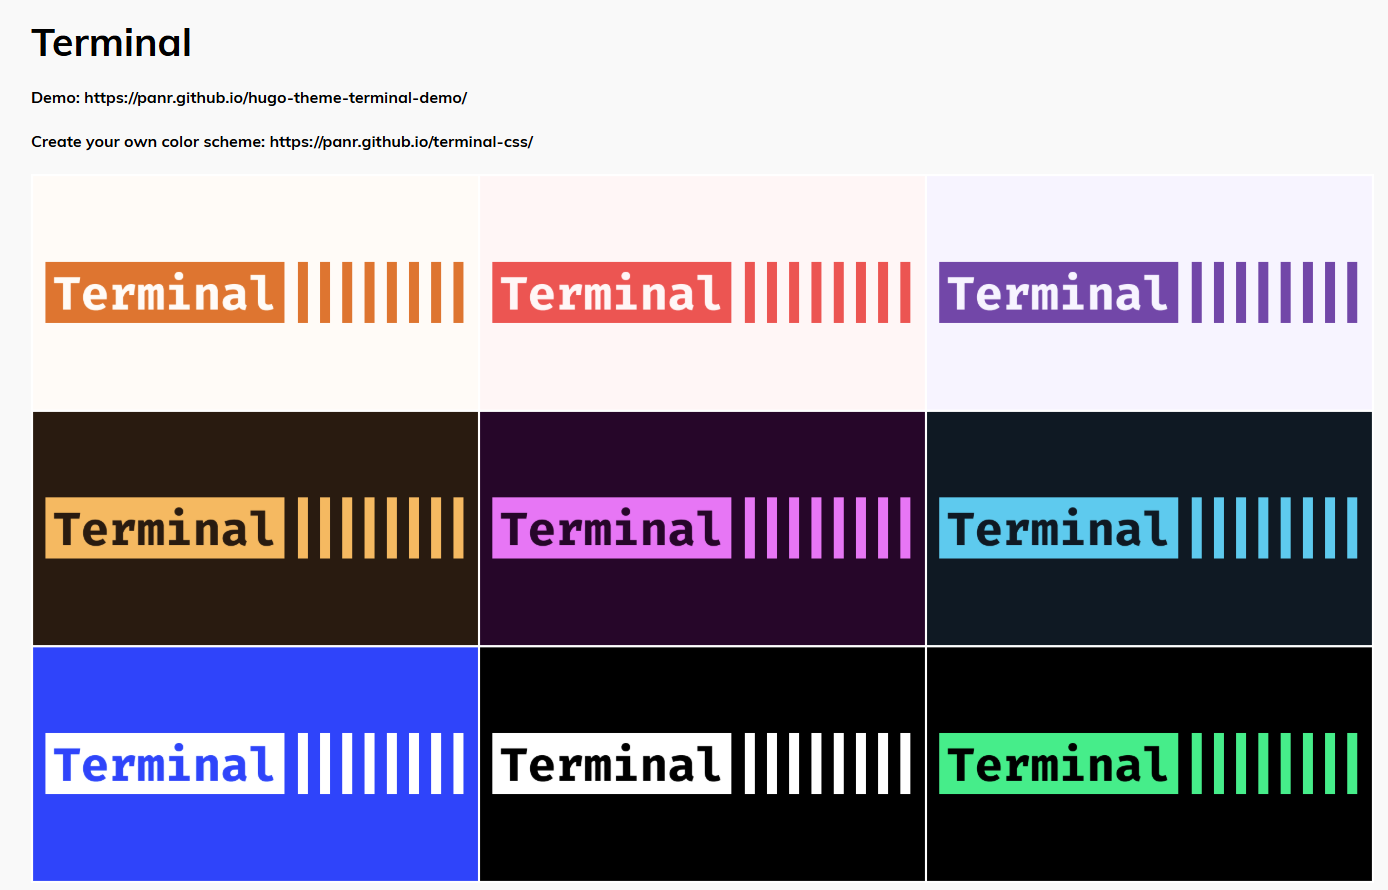
I chose this one :

It looks like this :

At this stage, you need to copy the script from [here](https://themes.gohugo.io/themes/hugo-theme-terminal/#how-to-configure to the hugo.toml and then modify it (if you wish).
_Note : Please make sure to not to copy this part of the script :

5. Customizing Hugo Settings#
You can modify the configuration file by running notepad hugo.toml. From there, you can customize the color scheme, enable or disable the centerTheme option, and modify the about and showcase URL’s in the main menu.
baseurl = "/"
languageCode = "en-us"
# Add it only if you keep the theme in the `themes` directory.
# Remove it if you use the theme as a remote Hugo Module.
theme = "re-terminal"
paginate = 5

[params]
  # dir name of your main content (default is `content/posts`).
  # the list of set content will show up on your index page (baseurl).
  contentTypeName = "posts"

  # ["orange", "blue", "red", "green", "pink"]
  themeColor = "orange"

  # if you set this to 0, only submenu trigger will be visible
  showMenuItems = 2

  # show selector to switch language
  showLanguageSelector = false

  # set theme to full screen width
  fullWidthTheme = false

  # center theme with default width
  centerTheme = true

  # if your resource directory contains an image called `cover.(jpg|png|webp)`,
  # then the file will be used as a cover automatically.
  # With this option you don't have to put the `cover` param in a front-matter.
  autoCover = true

  # set post to show the last updated
  # If you use git, you can set `enableGitInfo` to `true` and then post will automatically get the last updated
  showLastUpdated = false

[params.twitter]
  # set Twitter handles for Twitter cards
  # see https://developer.twitter.com/en/docs/tweets/optimize-with-cards/guides/getting-started#card-and-content-attribution
  # do not include @
  creator = ""
  site = ""

[languages]
  [languages.en.params]
    languageName = "English"
    title = "re-Terminal"
    subtitle = "A simple, retro theme for Hugo"
    owner = ""
    keywords = ""
    copyright = ""
    menuMore = "Show more"
    readMore = "Read more"
    readOtherPosts = "Read other posts"
    newerPosts = "Newer posts"
    olderPosts = "Older posts"
    missingContentMessage = "Page not found..."
    missingBackButtonLabel = "Back to home page"
    minuteReadingTime = "min read"
    words = "words"

    [languages.en.params.logo]
      logoText = "re-Terminal"
      logoHomeLink = "/"

    [languages.en.menu]
      [[languages.en.menu.main]]
        identifier = "about"
        name = "About"
        url = "/about"
      [[languages.en.menu.main]]
        identifier = "showcase"
        name = "Showcase"
        url = "/showcase"
6. Prepare Your Hugo Site for Obsidian Integration#
Open the Hugo site folder in your terminal.
cd C:\MyWebsites\my-first-site
Locate the content folder inside your Hugo site directory. This is where Hugo looks for content.
7. Syncing Obsidian with Hugo#
To sync Obsidian notes with Hugo, you’ll manually or automatically copy Markdown files from your Obsidian vault to Hugo’s content folder.
a.Manual Method#
-
In Obsidian, right-click the folder containing your blog posts and choose “Show in system explorer”.

-
Copy the Markdown files you want to publish.
-
Paste the files into the Hugo
contentfolder:
C:\MyWebsites\my-first-site\content\posts
b. Automated Method with Scripts#
Create a .bat file (e.g., sync_posts.bat) with the following content:
robocopy "C:\Path\To\ObsidianVault\Posts" "C:\MyWebsites\my-first-site\content\posts" *.md /mir
Save the .bat file and double-click it whenever you want to sync your posts.
8. Verify Posts in Hugo#
Start the Hugo server to preview your synced content:
hugo server
Visit http://localhost:1313 in your browser to ensure the posts appear correctly.
So far, we have seen how to take text that we have written in Obsidian and convert it into HTML code using Hugo, but what about images? If I want to capture an image and add it to my posts, how do I do that? Fortunately, I found this Python script (that I optimized to take into consideration the gif and jpeg images) on the YouTube channel NetworkChuck:
You’ll also need to install Python/Python3 :) Go to the official Python website: https://www.python.org/downloads/
Copy this code, save it as a file with a .py extension, and ensure it is placed within the directory structure of your Hugo site.
import os
import re
import shutil
# Paths (using raw strings to handle Windows backslashes correctly)
posts_dir = r"C:\Path\To\ObsidianVault\content\posts"
attachments_dir = r"C:\Path\To\ObsidianVault\"
static_images_dir = r"C:\MyWebsites\my-first-site\static\images"
# Step 1: Process each markdown file in the posts directory
for filename in os.listdir(posts_dir):
if filename.endswith(".md"):
filepath = os.path.join(posts_dir, filename)
with open(filepath, "r", encoding="utf-8") as file:
content = file.read()
# Step 2: Find all image links in the format 
images = re.findall(r'\[\[([^]]*\.(?:png|jpe?g|gif))\]\]', content)
# Step 3: Replace image links and ensure URLs are correctly formatted
for image in images:
# Prepare the Markdown-compatible link with %20 replacing spaces
markdown_image = f"[Image Description](/images/{image.replace(' ', '%20')})"
content = content.replace(f"[[{image}]]", markdown_image)
# Step 4: Copy the image to the Hugo static/images directory if it exists
image_source = os.path.join(attachments_dir, image)
if os.path.exists(image_source):
shutil.copy(image_source, static_images_dir)
# Step 5: Write the updated content back to the markdown file
with open(filepath, "w", encoding="utf-8") as file:
file.write(content)
print("Markdown files processed and images copied successfully.")
Make sure to change the paths according to your installation.
Conslusion#
Voilà, That’s it for today! I know it’s a lot of information, but it’s a necessary. In the second part, we will discuss the interaction between Hugo and GitHub to publish Hugo’s public folder to GitHub so that it can later be retrieved from the hosting site (for my part, I use Hostinger).
Have you ever struggled with managing your blog efficiently? This workflow saved me hours and might just do the same for you!
I hope you found this informative. If you have any comments, feel free to let me know by sending an email to: nazim@amfdigitalroute.com.